Thursday, August 23, 2012

The Aggies are we...

If you come from a long line of Fightin' Texas A&M Aggies or you are the first in your family, it's important to show that Aggie school spirit.  It's tradition that can't be understood looking in and can't be explained looking out.  It's humping it, yelling it, and whooping it up.  It's complicated unless you're an Aggie. 

Dear friends and fellow Aggie Alum are welcoming their first child, a little girl, this October.  We found a cute outfit for the 6-9 month range, but failed to find many outfits in the 0-3 month range (yeah, it's THAT important).

So, whatcha gonna do ? Well, 'round these parts.....ya make one.

What you'll need:

Onesies in sizes you need
Felt/Fabric of your choice
Heavy Duty Fusible Wonder Under
Fabric glue
Templates of what you want on your onesie
iron
ironing board
fabric scissors


First, you need some templates to trace around.  Cut each letter/shape out.


Next, measure out enough fabric/felt for your shapes/templates (sorry no pic here)

Place your measured fabric/felt over your wonder under and cut the wonder under to same size as your fabric/felt.

There's a "rough" side and a smooth side on the wonder under.  You want the wonder under's rough side to fuse to the wrong side of your fabric.  If you are using felt, it doesn't matter, since both sides of the felt are the same.  Set your iron to "wool/silk" setting, place your fabric wrong side up on the ironing board, place your wonder under rough side down on top of your fabric/felt and iron away.  Test a corner of the two peices to see that your paper comes off and leaves a film on the fabric, that means the fusing took place. 

This is wonder under:


I borrowed a pic from patsythompsondesigns.com to show you the wonder under fused to the wrong side (the under side) of the fabric:


 Now, trace your templates/shapes on the paper side of your wonder under. Use your fabric scissors to cut each letter out.  If you are doing letters that have to go a certain "way", remember to trace them backwards, so they come out the "right" way when you are done.

With the aTm, it doesn't matter how they are traced, because they are symmetrical:


I used fabric glue on my bib portions because it worked better.  Be sure to place a baggie or peice of cardboard between the front and back of the onesie where you are gluing, otherwise, you'll glue your onesie together.

See the "aggie girl"?  Make sure you trace something like that backwards on to your wonder under paper.


She's gonna be one cute Aggie in training!! :)


Thanks for looking! 


Don't forget to check out the "Party Central" tab to see what parties we love linking up to every week!

I linked up: Somewhat Simple Linky Party


HouseofHepworths


-Kourtney

Monday, July 30, 2012

Where's the beef?

My dear darling husband constantly runs around the house saying, "Where's the beef?" about 7 pm every night.  At that moment, I look up from whatever craft I'm working on and realize I should feed the poor man.  Crafting takes a front and center approach and most everything falls to the wayside, especially home cooked meals.  So I scrounge around the pantry and fridge and plop stuff into a pan/pot and hope it turns out.  After all, he does the dusting, cleaning and laundry when I'm on a craft binge, the least I can do is dinner.

But I'm tired of scrounging....thinking....and the like.  SOOOO, I've been tempted for many months to build a meal calendar to help alleviate the scrounging and thinking part and make it more a set, 'I will make this on this day and stop trying to get it together at the last minute'.


Silhouette, double-sided paper, tacky tape, push pins and black sticker letters to the rescue!!  I used Avery 2 x 4 inch clear labels and put main courses, side dishes and desserts on each one.  I then adhered the labels to paper cutouts that were 2 1/4 x 4 inches.  Then Silhouette helped me cut the fold over pockets.  I used 1/8 inch eyelets in the hanging holes to make them a little more durable.   Tacky tape holds all the pockets together. 

Eventually, I'll put a cute little "quote board" on the bottom right for inspirational thoughts. 

3M Command strips hold the entire board to the inside of my pantry door. 

What a relief....no more scrounging, thinking and sometimes sub par dinner turn outs! 

Just good ole cooking and a plan. 

Now I pick out what I want for the next two weeks, review the checklist at the bottom of each entree/side dish/dessert for necessary ingredients (which go on to my Saturday shopping list if I don't have them), try to make them correspond with as many coupons as possible and have one less thing to stress about.

Pretty cute, huh?


Don't forget to check out the "Party Central" tab to see what parties we love linking up to every week!

Saturday, June 2, 2012

Card of the week and stencil work

 I made a wedding card....it's pretty cute!  I copied an idea from Stampin Up, they really do come up with the sweetest things.  I tried to get creative and do my "congrats" at an angle....not really a fan, but now I know for next time.  If you'd like to get your hands on the products Stampin Up's creative team used, you can order direct from my website or call me and I'll place the order for you. 
Email me- kourtneymrivera@gmail.com or visit my website.


In other news, Laura wanted a stencil for a DIY lampshade product and here it is!  If you'd like your own 12"X12", 12"X24" or  24"X24" stencil, let me know!  

         Cost*: $10 for heavy cardstock
                    $15 for plastic, easy to use over and over again
                    $15 for self adhering stencil, one time use only, works great for projects where seepage is 
                         not acceptable.
                   *Plus shipping

Pretty cute huh?    


Thanks for viewing, have a great day!

-Kourtney

Don't forget to check out the "Party Central" tab to see what parties we love linking up to every week!

Tuesday, May 29, 2012

A how to for the distance Stampin Up group

Just in case you were wondering how to compile the cutest paper strawberries in your Stampin' Up care package:


If you'd like to order pre-cut templates, please email me at kourtneymrivera@gmail.com.

Have fun!

-Kourtney

Don't forget to check out the "Party Central" tab to see what parties we love linking up to every week!

Friday, May 25, 2012

Stampin Up Open House....I'M OFFICIAL!! YAY!

I did it! I said that I would do it and indeed I did!  SIGH....I'm in love with Stampin' Up.  I really can't say it enough.  So I joined the team and hosted my very first Stampin' Up Open House. 

This is the general "products offered/ products made" spread:

A view where you can see my circle garland hanging out with the window wreaths:


A close up of the main table:


Left side, don't you love the heart card?!?:

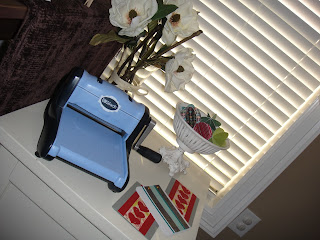
Right side, showing off my Sizzix "Big Kick", Stampin' Up carries the "Big Shot" (they do the same thing):

I set up the catalogs, order forms and pens under neath the main table:

Flower card made with hearts folded in half, an embossed background and button centers:

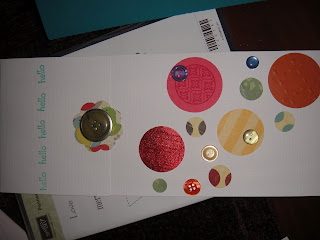
You'll have to cock your head to the left to see this one properly....apologies- "hello, you make me spin in circles card":
Showing off the circle/scallop garland again:


Close up of the garland action:


Here's our work table

I made "trash can" labels...cute huh?

And here's the little strawberry patch growing, these work great as party favors, we filled ours with chocolate!:

Again, cock you head to the left, here's our cute little heart attack cards, they are actually popping up from the card, much cuter in person:

And here's the goodies-cranberry turkey croissant sandwiches, muffins, cupcakes and fruit assortment (the raspberries are to die for):

And no goodies are complete without a "sweet" banner...ha ha, the banner is sweet and the goodies are sweet....it's all quite a literal pun:

And the drink station, with raspberry-watermelon lemonade (yum) and a tin bucket full of sodas and water:

SIGH....I am in love with Stampin' Up.  We've started an "online" group.  It's great!  Ask me for details if you like to join!  www.kourtneyskreations.stampinup.net

Let's do this again!

-Kourtney

Don't forget to check out the "Party Central" tab to see what parties we love linking up to every week!

Monday, May 21, 2012

Get a headboard, gain a oasis!

I've obsessed, planned, draped, dressed, and gussied up my bed for what seems like years.  You know  those moments, the ones where you think you've done such a good job on something, only to take a picture and think, 'It doesn't REALLY look like that, does it?'.

That was my bed for a while.  Bedding collections- really not worth it for me.  I thought I liked matchy bedding.  Who doesn't like a well coordinated, flowing space, right?  Evidently, three bedding collections later, I don't.  I like to hunt down the perfect pillow, the cutest throw, the softest sheets and then pile them all up on the bed and hope they work!

Also, headboards are not over rated.  I came, I learned, I am a believer.  Get a headboard, they are worth it.  Even if it's not an official headboard, get something above you (not heavy or sharp edged please), it makes it oh so grand!

I wish I had a before, they were bad, so bad!  It's funny now.  It wasn't then....so I deleted the offending pictures.

No further ado, here's the reformed, "mismatched" bed:


Don't forget to check out the "Party Central" tab to see what parties we love linking up to every week!

Wednesday, February 29, 2012

An Orginized Space

Question:   Are weevils ever a good thing?

Answer: Yes!    

About a year ago, I bought a bag of rice that ended up infesting my whole grain shelf before I found the problem.  Actually, my hubby found the problem in a bite of his sandwhich.  Gross!  After throwing everything away, even the perfectly fine stuff in shelves below, he agreed to get containers for everything.  Normally he would have not seen the need, so yay for weevils.  Sick, huh?

That was round one of getting organized. A year later, I decided my New Year's resolution would be to get every closet and cupboard in my house in tip top shape.  I have given myself a year to do it.  Totally do-able!   I just finished my entire kitchen. I don't have a traditional walk-in pantry, but I have designated cupboards for everyhing that I like just as much.  My real "pantry" is in the mudroom and I would rather have everything closer to me in the kitchen.  That closet houses my appliances, bags, and office stuff.

 I won't bore you with pictures of the whole kitchen (even though I kind of want to).  Here are some of my favorite areas:

Snacks in penny candy jars and drinks

Spice cupboard.  My spice rack fits perfectly with room for my salt and pepper shaker.  I couldn't have made one better if I tried. I love it when stuff like that works out!  The middle shelf has more spices grouped by how frequently I use the item (red pepper in the back and dried onions in the front), and the top has bulk spices, salt and bread crumbs. 

Panty: drink mixes on top shelf, then crackers, grains, cereal, canned goods, box mixes, and syrups and sauces on the bottom

I put my bulk sized dry goods in glass canisters displayed on the bottom of my hutch.  I normally like things out of sight, but thought these looked nice and uniform.  What would you do?  Should they stay or should they go?

The last container will hold baked treats or homemade breads. I just need to make a {baked goods} label.
Baking cupboard: extra sugar on top (It's not in my cold storage because some kids got into it when I was not watching.  Have you ever had a whole room covered in powdered sugar?), then flour, powdered sugar, brown sugar, and granulated sugar in the white and silver containers in the middle with the oils, and then baking spices and ingredients on the bottom.  I am still on the lookout for cute little jars for the items on the bottom.
It's nothing too fancy, but I love the look of all the cansiters and the peace of mind knowing it is all safe.  It has taken me a year to collect all these containers, but doing it a little at a time makes it affordable.  Here's to keeping it up the rest of year!
                                                         
Don't forget to check out the "Party Central" tab to see what parties we love linking up to every week!
Related Posts Plugin for WordPress, Blogger...